The Art of Cleanliness: Why a Tidy Home Matters

This is part 1 of a 20-part installment to the “Ultimate Guide To Cleaning Your Home”.

A clean home is not just a pretty sight; it’s a sanctuary for the body and soul. We all know that feeling of walking into a freshly cleaned space—the air seems crisper, and the world feels more manageable. But beyond the immediate aesthetic appeal, the importance of cleanliness in the home runs deeper than you might think. In this article, we’ll explore the significance of maintaining a clean living environment and the myriad benefits it brings to your physical and mental well-being.

A Healthy Haven

One of the foremost reasons cleanliness in the home is essential is its direct impact on your health. A clean living environment significantly reduces the risk of illness and allergies. Dust mites, mold, and bacteria thrive in cluttered, dirty spaces, leading to respiratory problems and allergies. Regular cleaning minimizes these risks, helping you breathe easier and stay healthier.

Mental Clarity and Focus

The state of your home often reflects the state of your mind. A cluttered and dirty environment can contribute to stress, anxiety, and a sense of chaos. On the other hand, a clean and organized space promotes mental clarity and focus. You’ll find it easier to concentrate, be more productive, and experience an overall sense of calmness when your surroundings are tidy.

Boost to Productivity

Maintaining cleanliness in your home can boost productivity levels. When everything is in its place and the environment is orderly, you spend less time searching for lost items or dealing with unnecessary distractions. This newfound efficiency can spill over into other aspects of your life, making you more effective and goal-oriented.

Enhanced Mood and Well-Being

Coming home to a clean space is like a warm embrace after a long day. It’s no surprise that a clean living environment can have a positive impact on your mood and overall sense of well-being. The act of cleaning itself can be therapeutic, releasing endorphins and reducing stress levels. Plus, when your home is tidy, you’re more likely to invite friends over, fostering social connections and happiness.

Guest-Ready Anytime

Speaking of friends, maintaining cleanliness in your home means you’re always ready to host guests, whether it’s an impromptu visit or a planned gathering. No more frantic last-minute cleaning sessions when the doorbell rings!

Increased Safety

A clean home is a safe home. Cluttered spaces increase the risk of accidents, such as trips and falls. Additionally, proper cleaning practices help eliminate hazards like slippery floors and exposed electrical outlets, ensuring a safer environment for you and your loved ones.

A Sense of Pride

Finally, the importance of cleanliness in the home can’t be overstated when it comes to instilling a sense of pride. A well-kept home reflects your care for your living space and your commitment to a high standard of living. This pride in your home can extend to other aspects of your life, fostering a sense of responsibility and accomplishment.

Conclusion

In conclusion, maintaining cleanliness in your home goes far beyond appearances. It’s a cornerstone of good health, mental well-being, productivity, and safety. The benefits of a clean living environment are both immediate and long-lasting, providing you with a happier, healthier, and more enjoyable space to call home. So, let’s embrace the art of cleanliness, recognizing its profound impact on our lives.

The Cold, Wet Truth: How Home Steam Cleaners Over-Wet Carpets and Cause Problems

Hey there, cleaners! Today, I’ve got a gritty topic to dive into, and it’s something that might make you rethink your cleaning game. We’re talking about home steam cleaners and the mess they can create. I’m Adam Vermilyea, and I’m here to give it to you straight, just like I do in the professional cleaning world.

We all want clean carpets

Let’s face it – we all want clean carpets, right? But the question is, are you cleaning them the right way or falling into the trap of home steam cleaners that over-wet your carpets and leave you with more problems than solutions?

The Steam Cleaning Hype

Now, don’t get me wrong – I’m all about hustling hard and finding efficient solutions. Home steam cleaners seem like a dream come true – easy to use and promising sparkling clean carpets. But there’s a catch, and you need to know it.

The Over-Wetting Disaster

Here’s the problem: Home steam cleaners often over-wet your carpets. Sure, they steam away dirt and stains, but they can saturate your carpet with moisture, and that’s where the trouble begins. Over-wetting can lead to a whole slew of issues that nobody wants to deal with.

Mold and Mildew Invasion

Just like in business, moisture in the wrong place can lead to disaster. Over-wet carpets become a breeding ground for mold and mildew. These uninvited guests can ruin your indoor air quality, trigger allergies, and create a health nightmare. Mold and mildew are not your hustling partners; they’re your competition!

Carpet Delamination

Carpet delamination might sound like a fancy term, but it’s a real problem. When your carpet’s backing separates from the fibers due to excessive moisture, you’re looking at a costly carpet replacement. That’s not the kind of investment you want to make.

Stubborn Stains Return

Imagine working hard on a project, only to have it fall apart at the end. Over-wet carpets can bring back those stubborn stains you thought you’d conquered. The moisture can push old stains back up to the surface, leaving you frustrated and defeated.

Allergens on the Rise

Remember, allergens thrive in moist environments. Over-wet carpets become a haven for dust mites and other allergens, turning your clean home into an allergy battleground. That’s not the kind of environment where hustlers thrive!

The Cleaner’s Solution

So, what’s the solution? Do you ditch the home steam cleaner altogether? Not necessarily. The key is to use it wisely. Here’s how:

  1. Use the Right Equipment: Invest in a high-quality home steam cleaner that allows you to control moisture levels.
  2. Follow Instructions: Read the manufacturer’s instructions carefully and adhere to their guidelines on water usage and drying times.
  3. Ventilation Matters: Ensure proper ventilation in the cleaned area to aid in faster drying.
  4. Spot Test: Always spot-test in an inconspicuous area before tackling a larger carpet section.
  5. Prep Your Carpet: Vacuum thoroughly before using the steam cleaner to remove loose dirt and debris.
  6. Dry Thoroughly: Use fans or open windows to speed up the drying process after cleaning.

In service, we adapt and learn from our mistakes. The same goes for cleaning carpets. Don’t fall into the over-wetting trap. Clean like a professional – efficiently, smartly, and with your eyes on the long game. Your carpets will thank you, and you’ll avoid unnecessary problems that can set you back in your hustle journey.

Remember

Remember, the hustle is about finding the best way to get things done, and that includes cleaning. So, clean smart, hustle harder, and keep rocking your game! 💪🚀 #CleaningHustle

Technicians Responding Now!

Contact us today and get help you need and deserve.

We’re responding to all restoration emergencies now. Including Water Damage, Fire Damage, Smoke Damage, and more. Call Now.

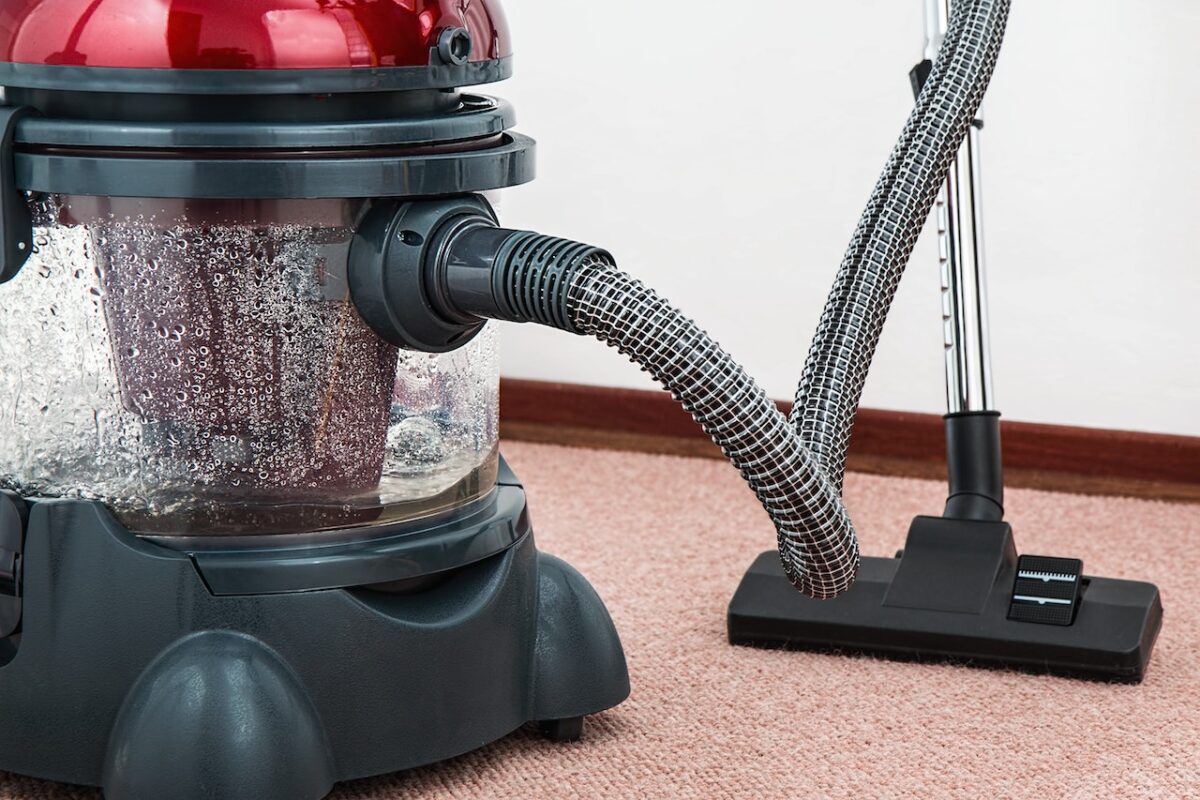
Does Your Vacuum Cleaner Suck? Let’s Talk About Cleaning Carpet!

Hey there, my hard working friends! I’m here to talk about something we all deal with in our daily lives, something that’s been around forever, but not everyone gives it the attention it deserves. Yep, you guessed it – vacuum cleaners! You might be wondering why on earth I’m talking about vacuum cleaners, but trust me, there’s a hard-work mentality even in the world of cleaning, and I’m here to break it down for you.

To tell the truth

First off, let me drop a truth bomb on you: Your vacuum cleaner might actually suck, and I don’t mean that in a good way. If you’re not using the right tools and techniques, your cleaning game could be seriously lacking. So, let’s dive into this dirty topic and see how we can level up our cleaning game!

  1. Invest in Quality

Just like in business, you’ve got to invest in quality if you want to see real results. Your vacuum cleaner is your cleaning MVP, so don’t cheap out on it. Get one with powerful suction and HEPA filters. Think of it as your A-team for dirt extraction.

  1. Hustle Harder, Not Faster

Don’t rush through your cleaning like you’re running a sprint. Slow down and take your time. Vacuum each area thoroughly and make multiple (think north to south and east to west) passes. It’s all about attention to detail, just like in your work.

  1. High-Traffic Areas Matter

In life, you focus your energy where it counts the most. The same goes for cleaning. Pay extra attention to high-traffic areas like entryways and living rooms. That’s where the dirt, crumbs, and pet hair tend to hang out.

  1. Stains Are Opportunities

You know how in life, obstacles can become opportunities? Well, stains are your cleaning opportunities. Don’t just accept them; tackle them head-on with the right stain removers and techniques. Turn those stains into success stories!

  1. Rise Above Allergens

In the cleaning game, allergens are your competition. Don’t let them win. Use a vacuum cleaner with HEPA filters to capture those tiny particles that can wreak havoc on your health. Your hustle deserves a clean, healthy environment.

  1. Stay Consistent

Just like everything, consistency is key. Don’t let your cleaning routine slip. Make it a habit to vacuum regularly. Consistency leads to long-term success, whether you’re cleaning or building a brand.

  1. Upgrade Your Accessories

In the world, you’d invest in tools that make your job easier. Well, in cleaning, it’s no different. Get the right accessories like brush attachments for upholstery and crevice tools for tight spaces. It’s all about having the right tools in your cleaning arsenal.

  1. Don’t Forget About Maintenance

Even the best cleaners need downtime and maintenance. Your vacuum cleaner is no different. Regularly clean and replace filters, empty the dustbin, and inspect for wear and tear. A well-maintained vacuum is a cleaning powerhouse.

Your vacuum cleaner doesn’t have to suck…to clean.

So there you have it, scrubbers. Your vacuum cleaner doesn’t have to suck in a bad way. With the right mindset and approach, you can turn cleaning into a productive, satisfying effort. Remember, it’s not just about cleanliness; it’s about maintaining your environment so you can focus on conquering the world in your own unique way.

So get out there, clean like a boss, and keep hustling! Because in the world of cleaning, just like in business, the effort never stops. 💪✨ #CleaningHustle

Hate vacuuming?

Schedule with Benchmark Restoration & Cleaning and we will pre-vacuum your carpet for FREE with any Steam Cleaning.

Fall Fresh: Top 7 Cleaning Services to Get Your Home Ready for Autumn

As the leaves start to change colors and the air turns crisp, it’s time to embrace the beauty of fall. However, with this season also comes a new set of cleaning challenges. To help you prepare your home for autumn’s arrival, we’ve compiled a list of the top 7 cleaning services that will leave your living space cozy, clean, and ready to welcome the fall season with open arms.

The top 7 cleaning services for fall

  1. Gutter Cleaning Services: Fall brings falling leaves, and those leaves often find their way into your gutters. Clogged gutters can lead to water damage, so it’s essential to have them cleaned before the rainy season begins. Professional gutter cleaning services can remove debris and ensure that your gutters are functioning correctly.
  2. Carpet Cleaning Services: With more time spent indoors during the cooler months, your carpets may have collected dirt and dust over the summer. A professional carpet cleaning service can refresh your carpets, remove stains, and improve indoor air quality, making your home cozy and inviting.
  3. Chimney Sweeping Services: If you have a fireplace, it’s essential to have your chimney cleaned and inspected before lighting those first autumn fires. A chimney sweeping service will remove creosote buildup and ensure that your fireplace is safe and efficient.
  4. Window Cleaning Services: As the sun’s angle changes in the fall, it can reveal streaks and smudges on your windows that went unnoticed in the summer. Professional window cleaning services can make your windows sparkle, allowing more natural light to brighten your home during the shorter days of fall.
  5. Deep Cleaning Services: Fall is an excellent time for a thorough deep cleaning of your home. This service includes cleaning areas that are often overlooked, such as baseboards, ceiling fans, and behind appliances. A deep cleaning will leave your home feeling fresh and rejuvenated.
  6. Yard Cleanup Services: Don’t forget about your outdoor spaces. Fall is a season of falling leaves, and your yard can quickly become covered in debris. Yard cleanup services can help with leaf removal, lawn care, and preparing your garden for winter.
  7. HVAC Cleaning and Maintenance Services: As the weather cools, you’ll be relying on your heating system more frequently. It’s crucial to have your HVAC system cleaned and maintained to ensure it’s operating efficiently and providing clean air. This service can help improve indoor air quality and lower your energy bills.

Conclusion:

With these top 7 cleaning services, your home will be in tip-top shape for the fall season. From ensuring your gutters are clear to enjoying the warmth of a clean fireplace, these services will help you embrace the beauty and coziness of autumn without the stress of cleaning chores. So, why wait? Schedule these services today and get ready to enjoy a clean and comfortable home this fall.

About Benchmark

Benchmark Restoration and Cleaning is a trusted and reputable company based in Vancouver, Washington, known for its exceptional restoration and cleaning services. With a strong presence in the Vancouver area, Benchmark has established itself as a go-to source for homeowners and businesses seeking top-notch solutions for various cleaning and restoration needs. Their team of highly trained professionals is dedicated to providing a wide range of services, including water damage restoration, fire damage restoration, mold remediation, carpet cleaning, and more. What sets Benchmark apart is their commitment to excellence, customer satisfaction, and the use of cutting-edge techniques and equipment to deliver outstanding results. Whether you’re dealing with the aftermath of a disaster or simply seeking a deep cleaning for your home or business, Benchmark Restoration and Cleaning is a name synonymous with quality and reliability in Vancouver, WA.

How to prepare for your Healthy Home Package Cleaning

Benchmark’s Healthy Home Package is at the heart of every clean they offer – it’s their Core 10-Steps, Anti-Allergen Treatment, Speed Drying, Protectant, Sanitizing, and more. What it offers is a full spectrum of cleaning and sanitizing your home.

Here’s how to prepare for your upcoming Healthy Home Package Cleaning:

  1. Clear the Area: Prior to the cleaning appointment, remove any items or obstacles that could obstruct the cleaning process. If floors are to be cleaning, remove any loose or breakable items that can be of concern. If countertops, same, clear and clean the and other surfaces to allow the cleaners easy access to the areas that need attention.
  2. Declutter: Tidy up the space by removing excess clutter such as toys, clothes, or personal items. This will make it easier for the cleaners to focus on the cleaning tasks and ensure they can reach all the areas that need attention.
  3. Communicate Specific Needs: If there are any specific areas or items that require special attention, make sure to communicate this to the cleaning service beforehand. For example, if you have stains on upholstery or specific instructions for certain surfaces, let them know in advance.
  4. Prepare Pets: If you have pets, it’s a good idea to make arrangements to keep them in a separate area or outside during the cleaning appointment. This ensures the safety of both your pets and the cleaning technicians.
  5. Make Way for Parking: If parking is limited in your area, make sure to reserve or provide a space for the cleaning team’s vehicle. This will help facilitate a smooth and timely arrival.
  6. Ask About Pre-Cleaning Instructions: Contact Benchmark Restoration and Cleaning directly to inquire about any specific pre-cleaning instructions they may have. They can provide you with their recommended guidelines for preparing your space before their arrival.

What’s IS in a Healthy Home Cleaning?

Healthy Home Package w/Core 10 Step Cleaning

Step #1.  Pre Inspection:  Every carpet is thoroughly inspected before cleaning, noting level of soiling, spots/stains, and wear.

Step #2.  Furniture Moving:  Sofas, Chairs and Tables are carefully moved.

Step #3.  Pre-Spray:  Most used areas are pre-treated to break down Soil.

Step #4.  Pre-Spot:  Difficult spots are treated with special solutions to increase chances for removal.

Step #5.  Pre-Grooming:  Special tools are used to loosen the soils.

Step #6.  Soil Extraction & Rinse:  The loosened soil is then thoroughly extracted

Step #7.  Neutralize:  Your cleaning area is pH balanced to eliminate soil attracting residues.

Step #8.  Post Spot Treatment:  Treatment of specialty spots is included.

Step #9:  Post-Grooming:  To set the area for appearance and faster drying.

Step #10:  Post Inspection:  A post walkthrough is performed with you to make sure you are thrilled!

HEALTHY HOME PACKAGE ADDS:

Step #11  DrySteem™ Extraction:  Our exclusive DrySteem™ System removes 85% more  moisture so your cleaned areas are dry in about 2-3 hours

Step #12  Factory FiberGuard Protectant:   To protect agains soil, liquid and oil based spills.

Step #13  Commercial Pile Lifting:  To remove the gritty dry soil.

Step #14 Spray & Wipe Down Baseboards:  Eliminating the dust that accumulates.

Step #15 DuraSan™ Sanitizing:  To assist in neutralizing bacteria, allergens, and dust mites.

Cleaning Length: The time to clean your items depends on the volume, and the amount of contents that require moving before, and after your cleaning. That said, most cleans take about 2 -3 Hours.

Drying Length: Drying time can vary based on severity of soiling, and humidity in the air. On it’s own, it can take approximately 2 – 3 hours to dry.

What’s NOT in a Healthy Home Cleaning

It has everything – It is the full spectrum to ensure your cleanest treatment possible.

The Healthy Home Package is the MOST POPULAR of the three packages Benchmark offers. Reviews of this package point to the DrySteem Rinse & Extraction as one of the major wins of this clean, because it leaves the carpet dry to the touch, and protected from future spills, stains and dirt.

How to prepare for your Cleaner Longer Package Cleaning

Benchmark’s Cleaner Longer Package is at the heart of every clean they offer – it’s their Core 10-Steps plus speed drying and factory protectant. What it offers is a comprehensive base that “checks” all the boxes. It’s has steam cleaning, spot removals are included, pH neutralizing is also a part of the clean, and grooming to ensure the best visual appeal.

Here’s how to prepare for your upcoming Cleaner Longer Package Cleaning:

  1. Clear the Area: Prior to the cleaning appointment, remove any items or obstacles that could obstruct the cleaning process. If floors are to be cleaning, remove any loose or breakable items that can be of concern. If countertops, same, clear and clean the and other surfaces to allow the cleaners easy access to the areas that need attention.
  2. Declutter: Tidy up the space by removing excess clutter such as toys, clothes, or personal items. This will make it easier for the cleaners to focus on the cleaning tasks and ensure they can reach all the areas that need attention.
  3. Pre-Vacuum: Removal of insolubles will have a decisive impact on how deep a Freshen Up cleaning will be. If vacuuming isn’t performed first – the Freshen Up will clean those insolubles (which is ok), however, to get the most bang for you buck, if you pre-vacuum, your Freshen Up will turn into the deepest clean possible. 
  4. Communicate Specific Needs: If there are any specific areas or items that require special attention, make sure to communicate this to the cleaning service beforehand. For example, if you have stains on upholstery or specific instructions for certain surfaces, let them know in advance.
  5. Prepare Pets: If you have pets, it’s a good idea to make arrangements to keep them in a separate area or outside during the cleaning appointment. This ensures the safety of both your pets and the cleaning technicians.
  6. Make Way for Parking: If parking is limited in your area, make sure to reserve or provide a space for the cleaning team’s vehicle. This will help facilitate a smooth and timely arrival.
  7. Ask About Pre-Cleaning Instructions: Contact Benchmark Restoration and Cleaning directly to inquire about any specific pre-cleaning instructions they may have. They can provide you with their recommended guidelines for preparing your space before their arrival.

What’s is IN a CLEANER LONGER Cleaning?

Freshen Up Package w/Core 10 Step Cleaning

Step #1.  Pre Inspection:  Every carpet is thoroughly inspected before cleaning, noting level of soiling, spots/stains, and wear.

Step #2.  Furniture Moving:  Sofas, Chairs and Tables are carefully moved.

Step #3.  Pre-Spray:  Traffic areas are pre-treated to break down Soil.

Step #4.  Pre-Spot:  Difficult spots are treated with special solutions to increase chances for removal.

Step #5.  Pre-Grooming:  Special tools are used to loosen the soils.

Step #6.  Soil Extraction & Rinse:  The loosened soil is then thoroughly extracted

Step #7.  Neutralize:  Your carpet is pH balanced to eliminate soil attracting residues.

Step #8.  Post Spot Treatment:  Treatment of specialty spots is included.

Step #9:  Post-Grooming:  To set the pile for appearance and faster drying.

Step #10:  Post Inspection:  A post walkthrough is performed with you to make sure you are thrilled!

CLEANER LONGER PACKAGE ADDS:

Step #11  DrySteem™ Extraction:  Our exclusive DrySteem™ System removes 85% more  moisture so your carpet is dry in about 2-3 hours

Step #12  Factory FiberGuard Protectant:   To protect agains soil, liquid and oil based spills.

Cleaning Length: The time to clean your items depends on the volume, and the amount of contents that require moving before, and after your cleaning. That said, most cleans take about 2 -3 Hours.

Drying Length: Drying time can vary based on severity of soiling, and humidity in the air. On it’s own, it can take approximately 3 – 6 hours to dry.

What’s NOT in a Cleaner Longer Cleaning

#1.  Pre Vacuuming: Research shows that 70% of most soiling in insoluble material (like sand), that will not dissolve or bond with a cleaning agent. This means that 70% is most productively removed by a deep, thorough vacuuming. 

#2. Sanitizing: Sanitizing, involves reducing the number of microorganisms on surfaces to a safe level determined by public health standards. It aims to kill or inhibit the growth of bacteria, viruses, and other harmful microorganisms that may cause illness or contamination. Sanitizing typically involves using disinfectants or sanitizing solutions, that are specifically designed to kill or reduce the presence of pathogens.

#3. Deodorizing: Deodorizing eliminates or neutralizes unpleasant odors from a space, object, or surface. Here’s how deodorizing works and what it accomplishes:

Deodorizing agents are designed to chemically react with odor-causing molecules, altering their structure or neutralizing them. This helps eliminate the unpleasant smell rather than just masking it temporarily.

#4. Anti-Allergen: Anti-allergen treatments are designed to reduce or minimize the presence of allergens in the environment. Allergens are substances that can trigger allergic reactions in susceptible individuals. These reactions can range from mild symptoms like sneezing and itching to more severe responses such as difficulty breathing or anaphylaxis. 

The Cleaner Longer Package is the MOST POPULAR of the three packages Benchmark offers. Reviews of this package point to the DrySteem Rinse & Extraction as one of the major wins of this clean, because it leaves the carpet dry to the touch, and protected from future spills, stains and dirt.

How to prepare for your Freshen Up Cleaning

Benchmark’s Freshen Up Package is at the heart of every clean they offer – it’s their Core 10-Steps. What it offers is a comprehensive base that “checks” all the boxes. It’s has steam cleaning, spot removals are included, pH neutralizing is also a part of the clean, and grooming to ensure the best visual appeal.

Here’s how to prepare for your upcoming Freshen Up Cleaning:

  1. Clear the Area: Prior to the cleaning appointment, remove any items or obstacles that could obstruct the cleaning process. If floors are to be cleaning, remove any loose or breakable items that can be of concern. If countertops, same, clear and clean the and other surfaces to allow the cleaners easy access to the areas that need attention.
  2. Declutter: Tidy up the space by removing excess clutter such as toys, clothes, or personal items. This will make it easier for the cleaners to focus on the cleaning tasks and ensure they can reach all the areas that need attention.
  3. Pre-Vacuum: Removal of insolubles will have a decisive impact on how deep a Freshen Up cleaning will be. If vacuuming isn’t performed first – the Freshen Up will clean those insolubles (which is ok), however, to get the most bang for you buck, if you pre-vacuum, your Freshen Up will turn into the deepest clean possible.
  4. Communicate Specific Needs: If there are any specific areas or items that require special attention, make sure to communicate this to the cleaning service beforehand. For example, if you have stains on upholstery or specific instructions for certain surfaces, let them know in advance.
  5. Prepare Pets: If you have pets, it’s a good idea to make arrangements to keep them in a separate area or outside during the cleaning appointment. This ensures the safety of both your pets and the cleaning technicians.
  6. Make Way for Parking: If parking is limited in your area, make sure to reserve or provide a space for the cleaning team’s vehicle. This will help facilitate a smooth and timely arrival.
  7. Ask About Pre-Cleaning Instructions: Contact Benchmark Restoration and Cleaning directly to inquire about any specific pre-cleaning instructions they may have. They can provide you with their recommended guidelines for preparing your space before their arrival.

What’s IS in a Freshen Up Carpet Cleaning

Freshen Up Package w/Core 10 Step Cleaning

Step #1.  Pre Inspection:  Every thing we clean is thoroughly inspected before cleaning, noting level of soiling, spots/stains, and wear.

Step #2.  Furniture Moving:  Sofas, Chairs and Tables are carefully moved.

Step #3.  Pre-Spray:  Traffic areas are pre-treated to break down Soil.

Step #4.  Pre-Spot:  Difficult spots are treated with special solutions to increase chances for removal.

Step #5.  Pre-Grooming:  Special tools are used to loosen the soils.

Step #6.  Soil Extraction & Rinse:  The loosened soil is then thoroughly extracted

Step #7.  Neutralize:  Your cleaned area/medium is pH balanced to eliminate soil attracting residues.

Step #8.  Post Spot Treatment:  Treatment of specialty spots is included.

Step #9:  Post-Grooming:  To set the appearance and faster drying.

Step #10:  Post Inspection:  A post walkthrough is performed with you to make sure you are thrilled!

Cleaning Length: The time to clean your items depends on the volume, and the amount of contents that require moving before, and after your cleaning. That said, most cleans take about 2 -3 Hours.

Drying Length: Drying time can vary based on severity of soiling, and humidity in the air. On it’s own, it can take approximately 3 – 6 hours to dry.

What’s NOT in a Freshen Up Cleaning

#1.  Pre Vacuuming: Research shows that 70% of most soiling in insoluble material (like sand), that will not dissolve or bond with a cleaning agent. This means that 70% is most productively removed by a deep, thorough vacuuming.

#2. Sanitizing: Sanitizing, involves reducing the number of microorganisms on surfaces to a safe level determined by public health standards. It aims to kill or inhibit the growth of bacteria, viruses, and other harmful microorganisms that may cause illness or contamination. Sanitizing typically involves using disinfectants or sanitizing solutions, that are specifically designed to kill or reduce the presence of pathogens.

#3. Deodorizing: Deodorizing eliminates or neutralizes unpleasant odors from a space, object, or surface. Here’s how deodorizing works and what it accomplishes:

Deodorizing agents are designed to chemically react with odor-causing molecules, altering their structure or neutralizing them. This helps eliminate the unpleasant smell rather than just masking it temporarily.

#4. Anti-Allergen: Anti-allergen treatments are designed to reduce or minimize the presence of allergens in the environment. Allergens are substances that can trigger allergic reactions in susceptible individuals. These reactions can range from mild symptoms like sneezing and itching to more severe responses such as difficulty breathing or anaphylaxis.

#5. Protectant: A protectant is a type of product that is applied to surfaces, materials, or objects to provide a layer of protection against various damaging factors. The purpose of a protectant is to enhance durability, longevity, and resistance to specific elements or conditions.

6. Speed Drying: Speed drying can be beneficial in cleaning processes for time efficency, Prevention of Mold and Mildew, Stain Prevention, Reduced Odor, Preservation of Materials.

It’s important to see the Freshen Up as the name states, it’s for areas, and items that are cleaned frequently, and thereby do not need the added value of pre-vacuuming, sanitizing, deodorizing, or anti-allergen treatments.

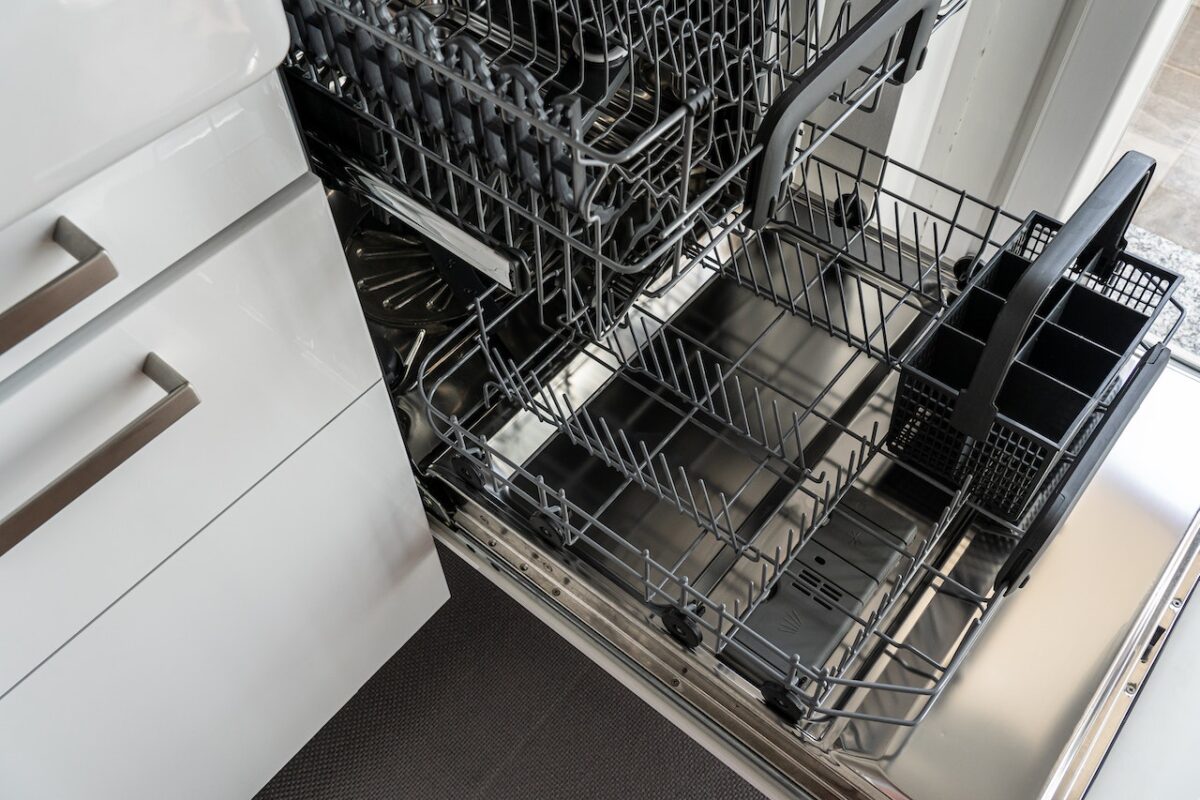
How to Clean a Dishwasher: A Step-by-Step Guide to Sparkling Results

A dishwasher is an indispensable appliance in the modern kitchen, streamlining the dishwashing process and saving valuable time. However, like any other appliance, it requires regular cleaning to maintain optimal performance and hygiene. In this article, we will guide you through the step-by-step process of cleaning your dishwasher, ensuring sparkling clean dishes with each cycle.

Step 1: Empty the Dishwasher: Before starting the cleaning process, make sure the dishwasher is empty. Remove any dishes, utensils, or debris from the racks, filters, and spray arms. This allows for thorough cleaning of all components.

Step 2: Clean the Filter: The filter in your dishwasher plays a crucial role in trapping food particles and preventing clogs. Start by locating the filter, usually at the bottom of the dishwasher. Depending on the model, the filter may twist or pull out. Remove the filter and rinse it under running water to dislodge any food debris. Use a soft brush or toothbrush to scrub away stubborn residue. Once clean, reinsert the filter into its place.

Step 3: Wipe Down the Interior: Using a damp cloth or sponge, wipe down the interior walls, door gasket, and detergent dispenser of the dishwasher. Pay special attention to any visible grime or residue. For stubborn stains or mineral buildup, a mixture of equal parts vinegar and water can be effective. Avoid using abrasive cleaners that may damage the interior.

Step 4: Clean the Spray Arms: The spray arms distribute water to clean the dishes. Over time, they can become clogged with debris or mineral deposits, affecting their efficiency. To clean the spray arms, gently remove them from their mountings. Clear any blockages by using a toothpick or small brush to dislodge particles from the spray holes. Rinse the arms thoroughly and reattach them.

Step 5: Descaling the Dishwasher: Mineral deposits from hard water can accumulate in your dishwasher and affect its performance. To remove these deposits, place a dishwasher-safe cup filled with white vinegar on the top rack. Run a hot water cycle without any dishes, using the vinegar to break down mineral buildup. Alternatively, you can use a dishwasher cleaner specifically designed for descaling. Follow the instructions on the product label for optimal results.

Step 6: Freshen the Interior: To eliminate any lingering odors, sprinkle baking soda on the bottom of the dishwasher. Run a short, hot water cycle to help neutralize odors and leave your dishwasher smelling fresh.

Step 7: Maintain Regularly: To keep your dishwasher in top condition, follow these maintenance tips:

  • Scrape off excess food from dishes before loading them into the dishwasher.
  • Regularly check and clean the filter to prevent clogs and maintain optimal performance.
  • Use a dishwasher cleaner or descaling agent every few months, especially in areas with hard water.
  • Inspect and clean the door gasket periodically to remove any debris or residue.

Cleaning your dishwasher not only ensures hygienic dishwashing but also extends the lifespan of the appliance. By following these step-by-step instructions, you can maintain a clean and efficient dishwasher, leaving you with spotless dishes after every cycle. Remember to consult the manufacturer’s guidelines for any specific recommendations for your dishwasher model.